

Maintaining a Sourdough Starter
You’ve done it! Your starter is alive, it’s growing, it’s active. Now, the most important part for a sourdough baker: Starter Maintenance. Once you figure out the schedule that works for you, you’ll be on your way to better, more consistent bread.
Table of Contents
Why maintenance is important
Understanding feeding ratios
How much should I feed my starter?
How often should I feed my starter?
Related Posts
When Is My Starter Ready to Use?
When Is My Starter Ready to Feed?
Please email us at
techniques@challengerbreadware.com with your
comments and questions.
Why maintenance is important
The purpose of maintaining your starter is to ensure that you have starter ready (i.e., healthy and strong) when you’re ready to make sourdough bread, pancakes, or whatever it is you want to make. For bakers who bake often, it’s best to feed your starter 2-3 times per day. If you don’t bake that often, you can keep your starter in the refrigerator and feed it once a week (see Storing Your Starter in the Refrigerator).
There’s so much written on how to best maintain a starter, but what does it all really mean? Since your starter is living, it needs food, which in this case is flour and water. We have found that using a high protein flour works best. In the United States, high protein flour is often referred to as bread flour as opposed to all-purpose flour. One of the easiest flours to find and one of the best flours in the US is what we use all the time: King Arthur Organic Bread Flour. In terms of water, we recommend that you use filtered water as often as you can.
Understanding feeding ratios
The trick with starters is figuring out how much food to give it. If you want to feed your starter 12 hours from now, and I want to feed my starter 8 hours from now, we each have to feed our starter a different amount of food. It does get a bit more complicated because if we each keep our starter at a different temperature, then even if we both want to feed our starters in 8 hours, we will each need to give our starters a different amount of food.
Starter Food = Flour + Water
So, we can’t tell you exactly what to feed your starter so that it keeps growing until it’s ready for its next feeding. You’re going to have to figure that out through trial and error. Below, you’ll find the information that you need to figure this out. If you have any questions, please email us at techniques@challengerbreadware.com.
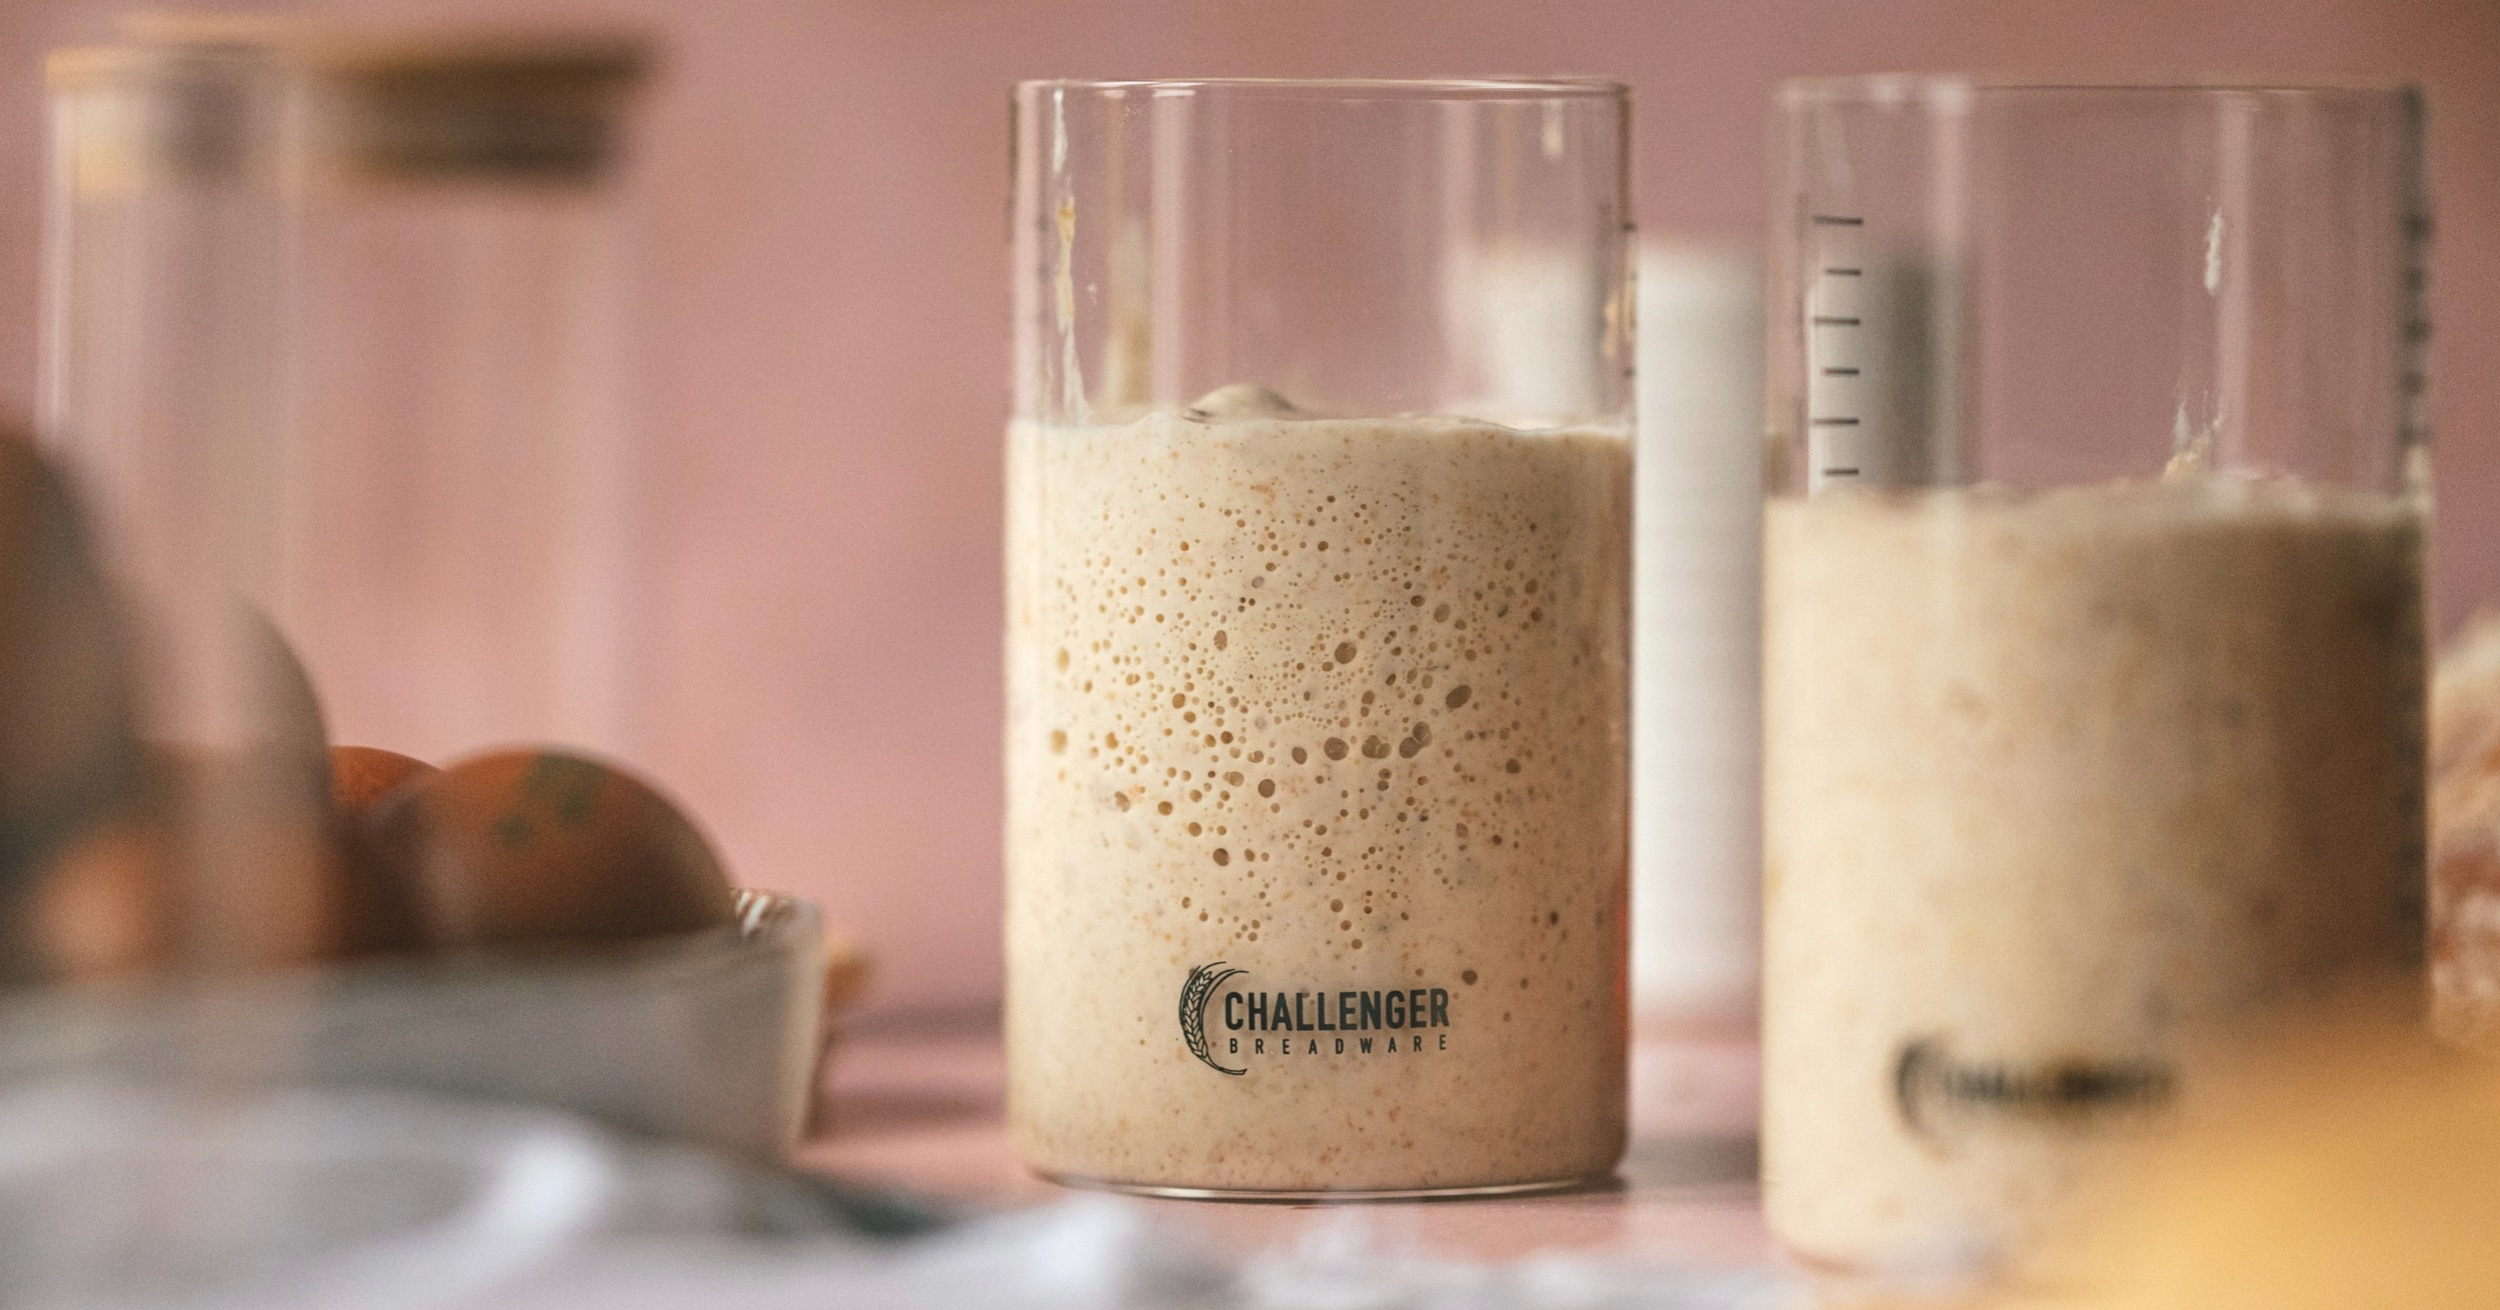
For the simplest starter, you’re going to feed it equal parts of water and flour; bakers call this type of starter a liquid starter, or a 100% hydration starter. The simplest way to think about how much food you’re giving your starter is to use a ratio like:
Starter : Water : Flour
So, let’s say you wanted to feed your starter 3 times as much food as starter. Bakers would express this as 1:3:3. This will help you understand other articles that you read about starters, and there are lots of them. The easiest way to really think about it is “3x.” This means that every time you want to feed your starter, you want to add 3 times the amount of water and 3 times the amount of flour; for every gram of starter, you would add three grams of water and three grams of flour.
As I said, the water and flour that you add is food for the microbes that are already in your starter. As the microbes eat the food, they let off gas. These are the holes you’ll see if you look at the sides of your Starter Jar. As your starter fills with gas it grows in volume. Eventually, the microbes will run out of food. Your job as a baker is to figure out when the food runs out so that you can feed your starter again.
The temperature of your starter is really important because the microbes eat more food as the temperature gets warmer and less food as the temperature gets colder. The best thing you can do is find a place to store your starter that’ll be a bit on the warm side, around 78°F (23-26°C). This can be a certain cabinet in your kitchen or house, the top of your refrigerator, or wherever works for you. The best way to maintain a consistent temperature is to keep your starter in a proofing box.
Please read When Is My Starter Ready To Feed to learn more about how to tell when your starter is at its peak — meaning it has just run out of food, and it’s ready to bake with.
Every baker’s schedule is different which means that every baker’s starter is on a different schedule. Feeding your starter every 24 hours, 12 hours, 8 hours, or 4 hours are all reasonable feeding schedules. It doesn’t necessarily need to be so even either — You could feed your starter at 10am, 2pm, and 10pm. The key is to feed it at the same time(s) every day. This will help your starter get stronger, and a strong starter will make better bread. If you’re consistent, then your life will be easier and so will the life of your starter. It’s like having a baby because your starter gets hungry around the same time. Your starter will get cranky if you give it too much or too little food.
The best way to achieve this and get to know your starter is to feed it at the same time(s) every day. The more often you feed your starter, the less acidic it will be. This means that your bread will be on the milder side of tangy if this is the taste you enjoy. If you want your bread a little tangier, then you can feed it less often. If you’re a beginning baker, then it’ll be hard to know — just pick a schedule that works for you.
How much should I feed my starter?
How often should I feed my starter?
I can give you some guidelines as to how much food your starter is going to need, but you have to remember that these are just guidelines. You’re going to have to feed your starter a certain amount, and then at the next feeding you’re going to have to look at it and decide whether it ran out of food or not. I talk about this in When Is My Starter Ready to Feed.
Here are some basic guidelines for a starter that’s kept around 78°F / 26°C:
| Feeding Schedule | Feeding Amount |
| 24 hrs | 20x |
| 12 hrs | 10x |
| 8 hrs | 5x |
| 4 hrs | 1x |
So, what does this look like in practice? Let’s say that you want to feed your starter at 7am and 7pm every day — that would be a feeding schedule of every 12 hours. I’m assuming that you have a Starter Jar containing some starter that needs more food. Here are the steps:
- Stir up the starter that’s ready to feed
- Put a new Starter Jar on your scale and zero it out
- Spoon a little starter in your new jar and measure it’s weight
- Let’s assume that it weighs 5 grams. If you look at the table above, you’d see that you want to add 50 grams of filtered water and 50 grams of bread flour to your jar (50 grams is 10x the 5 grams that are in your jar). Stir and mix it up really good. Cover it, and let it sit until it’s time for the next feeding.
The next time your starter is ready to feed, you have to look at it and decide whether it ate all its food or didn’t – this is described in When Is My Starter Ready To Feed. If it ran out of food, then you want to give it a little more food at this next feeding. I always go up by 2. So, in the above example, I gave it 10x the amount of water and flour, and then I’d try 12x the amount of water and flour the next time.
What do you do when you want enhanced flavor and texture in your bakes, but don’t have a sourdough starter ready to go? Make a poolish!
- Feb 08, 2023
- 2 min read

Perfect Your Crust with the Challenger Inversion Method.
- Dec 02, 2025
- 2 min read + video
Perfect Your Crust with the Challenger Inversion Method.
- Nov 25, 2025
- 2 min read + video
We Share Good News
Be the first to know! We’ll send out emails with new products and promotions – as well as recipes and baking tips.