
Autolyse Technique
What exactly is an autolyse, and why is it important? Here’s an in-depth look at what happens during the autolyse period, and why it’s a key step in the bread making process.
Table of Contents
- What is autolyse?
- What happens during an autolyse period?
- Benefits of adding an autolyse
- Different ways to autolyse
- Why don’t we add salt during autolyse?
- How long should you autolyse?
- How do you know when the autolyse is complete?
Related Posts
Batard Shaping
Boule Shaping
Pre-Shape & Bench Rest
techniques@challengerbreadware.com with your
comments and questions.
What is Autolyse?
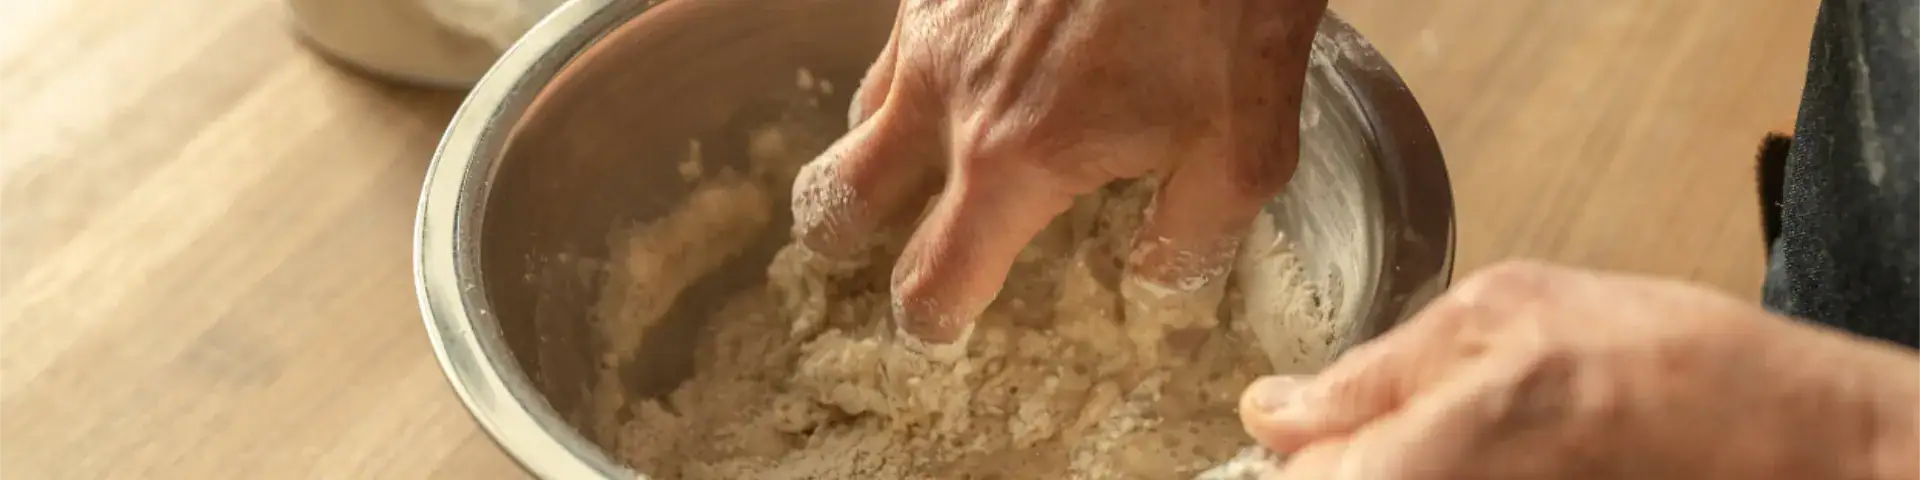
Autolyse (pronounced auto-lease) refers to the stage when the flour and water have been mixed together until just combined, and then left to rest before entering bulk fermentation. It is a step that has many benefits in bread making, but let’s get into why it is so important for baking better bread!
What Happens During an Autolyse Period?
The simplest explanation for what happens during an autolyse period, is that the flour becomes fully hydrated early on in the baking process. It takes a surprisingly long amount of time for water to fully absorb into the flour, so adding an autolyse gives it the time it needs before adding other ingredients.
On a more scientific level, adding water activates enzymes in the flour. The protease enzymes start to break down the proteins in the flour, and the amylase enzymes start converting the starches in the flour to sugars. The breakdown of the proteins makes the dough stretchier and more extensible, and the conversion of starches to sugars makes the sugars easier for the yeast to feed on, which is important for the fermentation process.
Benefits of Adding
an Autolyse
Adding an autolyse period has many benefits for your dough,
and for the final bake of your bread.
Your dough will be easier to handle
Allowing the flour to properly hydrate before jumping into bulk fermentation makes the dough much more extensible. You’ll likely notice that when you first mix the flour and water until it is just
barely combined, the dough will be shaggy, coarse, and will tear
if you try and stretch it. After the autolyse, the dough will smooth out considerably, and will have developed some strength and extensibility.
This development not only makes stretching and folding a smoother process, but it also has an impact on your final bake. With more extensibility, the dough will be easier to shape, and will better hold its shape. It also will be easier to score before baking.
An Autolyse Helps with Crumb Development
Because extensibility is such a big factor with an autolyse, it can affect the final oven spring during your bake. Dough that has undergone an autolyse is more likely to have a better oven spring, because it will expand more easily and quickly when it hits the heat of an oven.
An autolyse will also help make your crumb more tender. Because an autolyse allows for the flour to become properly hydrated, the final result is a much softer crumb. This is especially true when using whole wheat, or other whole grains that contain a higher percentage of bran. These breads tend to yield a dense crumb, but an autolyse helps produce a loaf that is softer and lighter.
Different Ways
to Autolyse
We’ve talked about why it is important to autolyse, but how exactly do you do it? Like many things in the bread making process, the exact technique will vary from baker to baker. Later we’ll discuss the timing of an autolyse later, but first let’s talk about the main autolyse methods:
Method 1:
without yeast or starter added
The first method, and the method that is considered to be the most proper definition of an autolyse, involves only flour and water. Simply combine the amount of water and flour called for in your recipe, mix it until it is just combined and no dry spots remain, cover the bowl, and let it rest for at least 20 minutes, and up to several hours.
Method 2:
with yeast or starter added
The second method for an autolyse includes adding the necessary amount of yeast or starter to the mix of flour and water. It’s important to remember that your bulk fermentation begins at this point, so make sure to include that in your notes.
With both of the above methods, we have found it best to add the flour to water in batches, and mixing in between. This makes it far easier to ensure that the flour and water is well mixed.
How Long Should
you Autolyse?
The big question: how long should you allow the dough to autolyse? Generally speaking, the longer the autolyse the better. However, if left for too long, the gluten structure in the dough can break down, which will be detrimental to your bread.
Here’s a general guide for how long you can, and should autolyse different flours:
- White bread flour: 30 minutes to 3 hours
- Whole wheat flour: 1 hour to 4 hours
- Whole grain flours generally take a bit longer to absorb
water, while more processed white flours absorb liquids
quickly.
Remember that if you are adding your yeast or sourdough starter in during the autolyse, your bulk fermentation starts at that point, so you should make a note of it. Regardless of what method you are using, a good rule of thumb is to start with a shorter autolyse, and then gradually increase the time as you become more comfortable and familiar with the process.
Why Don’t We Add Salt During Autolyse?
Salt gets added to the dough after the autolyse is completed. This is because salt causes the gluten strands to tighten up and contract, and it slows down the development process. If you are planning to autolyse for a very extended period of time, it may be alright to add the salt in to keep the autolyse from going too far. However, most bakers do not add the salt until the after autolyse is complete.
How Do You Know When The Autolyse is Complete?
There are a few signs that will tell you that your autolyse has been successful and you are ready to proceed to bulk fermentation. Firstly, your dough will appear much smoother than it did when you first mixed it. It will have a good amount of extensibility and stretch when you pull it. It also will have started developing enough gluten that it can pass a window pane test, which is when you stretch a small amount of dough so that you can see your fingers through it without the dough tearing.
Once your dough shows these signs of a completed autolyse, you’re ready to continue to the next big step: bulk fermentation!
We Share Good News
Be the first to know! We’ll send out emails with new products and promotions – as well as recipes and baking tips.