Do you want your next bake to stand out? Stenciling is the perfect way to add something unique to your baking process. Whether it’s a special occasion, or just for fun, this simple technique can make your bread extra special.
Table of Contents
An introduction to stenciling
Scoring stenciled dough
Here’s what you’ll need
How to stencil your bread
Related Posts
Scoring Tools and Technique Batard Scoring Boule Scoring
Please email us at
techniques@challengerbreadware.com with your comments and questions.
An introduction to stenciling
In this case, stenciling is the practice of applying flour or cocoa powder to your dough, and then using a traditional handmade or store-bought stencil. Stenciling is simply for decorative purposes. It works nicely for special occasions, like a heart for Valentine’s Day, or maybe even your favorite sports team’s logo for a big game. It’s a nice, simple way to add some personality to your bread. As for the stencil itself, you can make them yourself with an X-Acto knife. Or, you can make them with a Cricut Maker machine; it takes digital files and cuts out the stencils for you. Or, as shown in the video above, Greg has found some some items at the hardware store that work quite well. He uses a patterned aluminum vent grate that is easily bent to the shape of your dough.
Scoring stenciled dough
When you’re scoring a stenciled loaf, you want to make sure that it accentuates the pattern you’ve chosen. For example, if you’re stenciling a boule and place the pattern in the middle of the loaf, you should choose the classic square scoring pattern so that you don’t score through the middle of the design.
Here’s what you’ll need
A Stencil — we like to use card stock or store bought aluminum grates, like Greg uses in the video above.
Flour and/or Cocoa powder, depending on how many layers of stenciling you’d like to add.
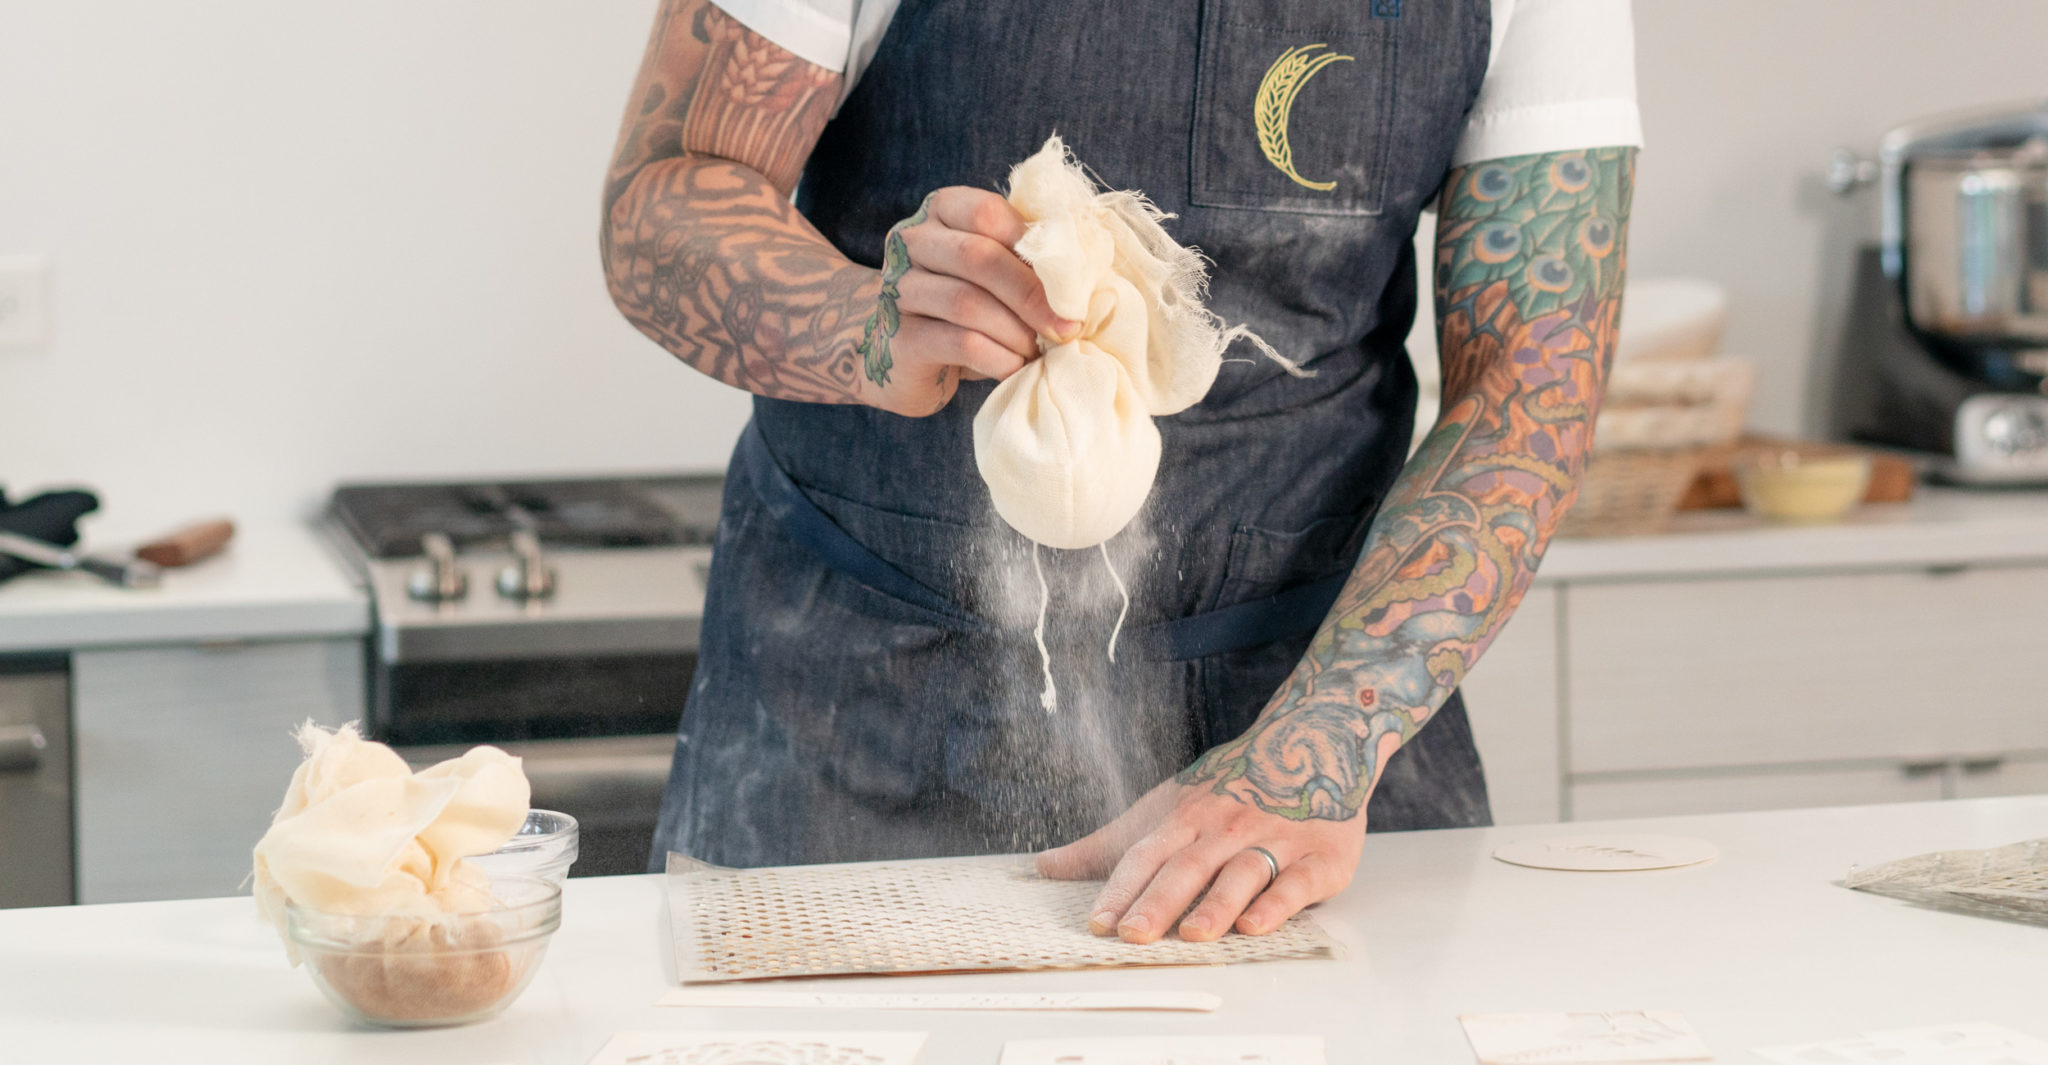
Cheesecloth and string to hold and distribute the flour and/or cocoa powder.
A dry brush to dust off your loaf, in the case you’d like to start over.
Lame for scoring your dough after you’ve applied the stencil pattern.
How to stencil your bread
Once you’ve gathered all of the things you’ll need to stencil and score your loaf, you can follow the instructions below, or follow along to the video above.
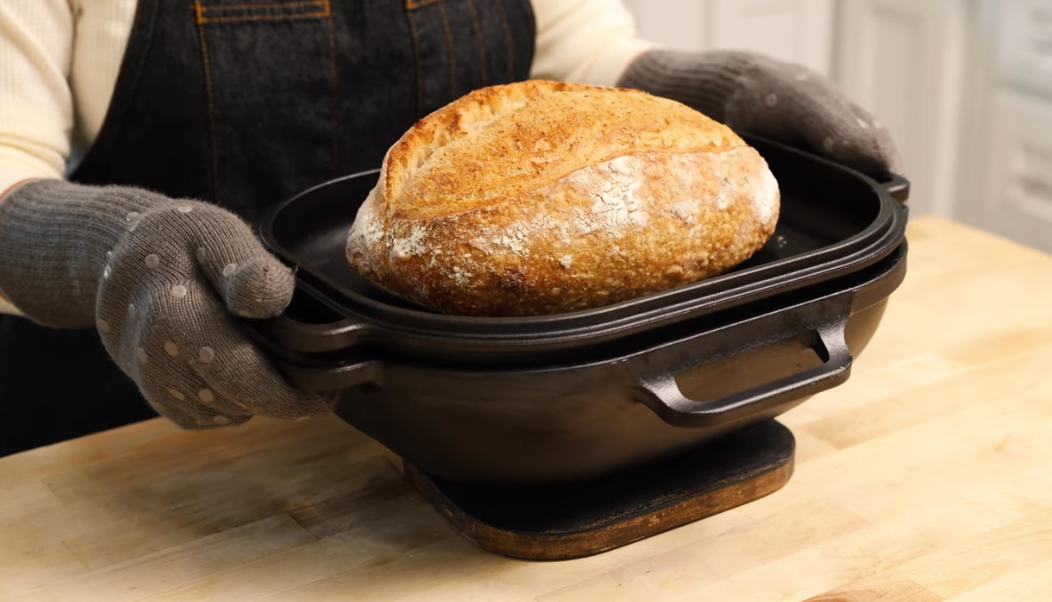
Step 1: Load your dough into the base of your Challenger Bread Pan, or onto a surface where you can easily transport it to the base. With your dry brush, dust off any flour or grains that might be on surface of your dough.
Step 2: Position your stencil on the dough and get your flour ready to dust.
Step 3: Going from top to bottom, lightly dust flour over the stencil. Use your off hand to ensure the stencil stays in constant contact with the dough. Remember — less is more.
Step 4: Score your loaf in a way that accentuates the stencil!
Perfect Your Crust with the Challenger Inversion Method.
Nov 25, 2025
2 min read + video
We Share Good News
Be the first to know! We’ll send out emails with new products and promotions – as well as recipes and baking tips.
We use cookies to personalize your experience on our site and measure the effectiveness of ads and web searches so that we can improve our communications and products. To learn more or amend your preferences, please see our Privacy and Terms Policy. I AGREE
Privacy & Cookies Policy
Privacy Overview
This website uses cookies to improve your experience while you navigate through the website. Out of these cookies, the cookies that are categorized as necessary are stored on your browser as they are essential for the working of basic functionalities of the website. We also use third-party cookies that help us analyze and understand how you use this website. These cookies will be stored in your browser only with your consent. You also have the option to opt-out of these cookies. But opting out of some of these cookies may have an effect on your browsing experience.
Necessary cookies are absolutely essential for the website to function properly. This category only includes cookies that ensures basic functionalities and security features of the website. These cookies do not store any personal information.
Any cookies that may not be particularly necessary for the website to function and is used specifically to collect user personal data via analytics, ads, other embedded contents are termed as non-necessary cookies. It is mandatory to procure user consent prior to running these cookies on your website.